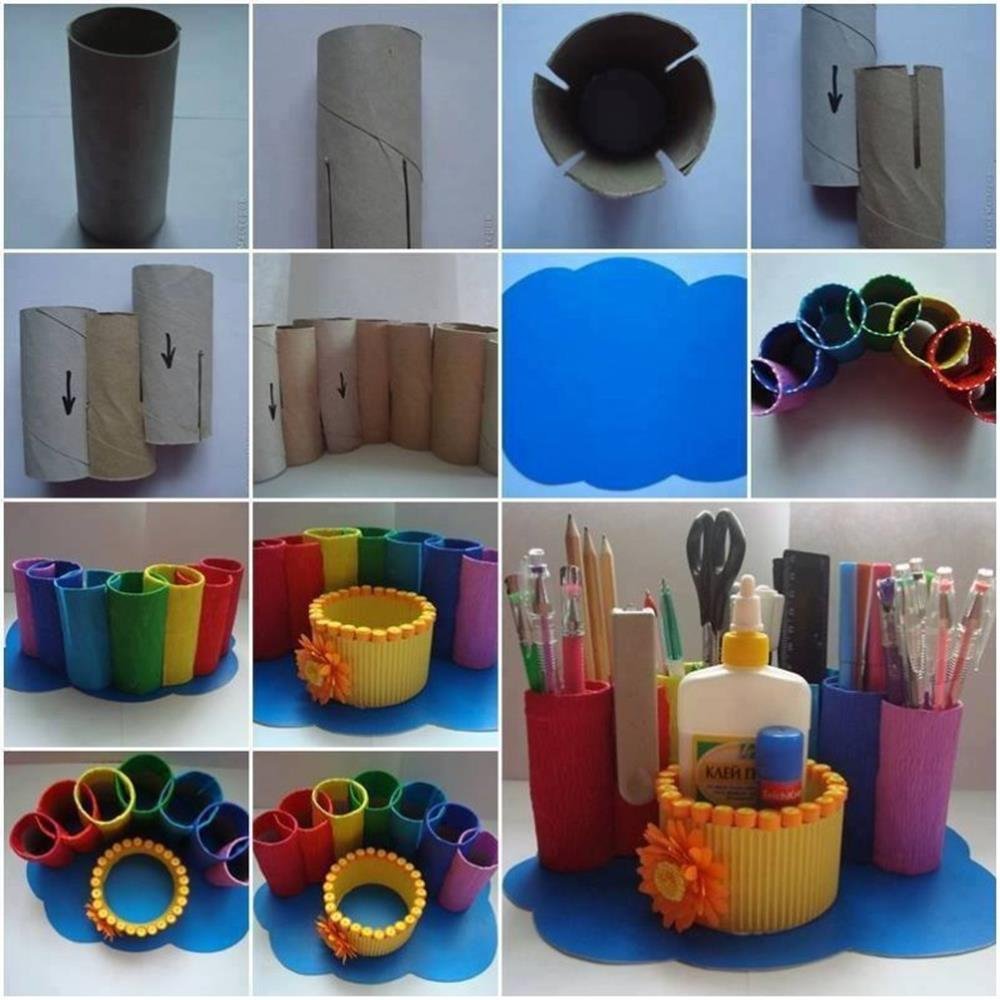
Diy cardboard organizer
Looking to declutter your space and add a touch of creativity? Look no further than a DIY cardboard organizer! This ingenious project allows you to transform ordinary cardboard into a functional and stylish storage solution. By repurposing materials, you not only save money but also contribute to a greener planet.
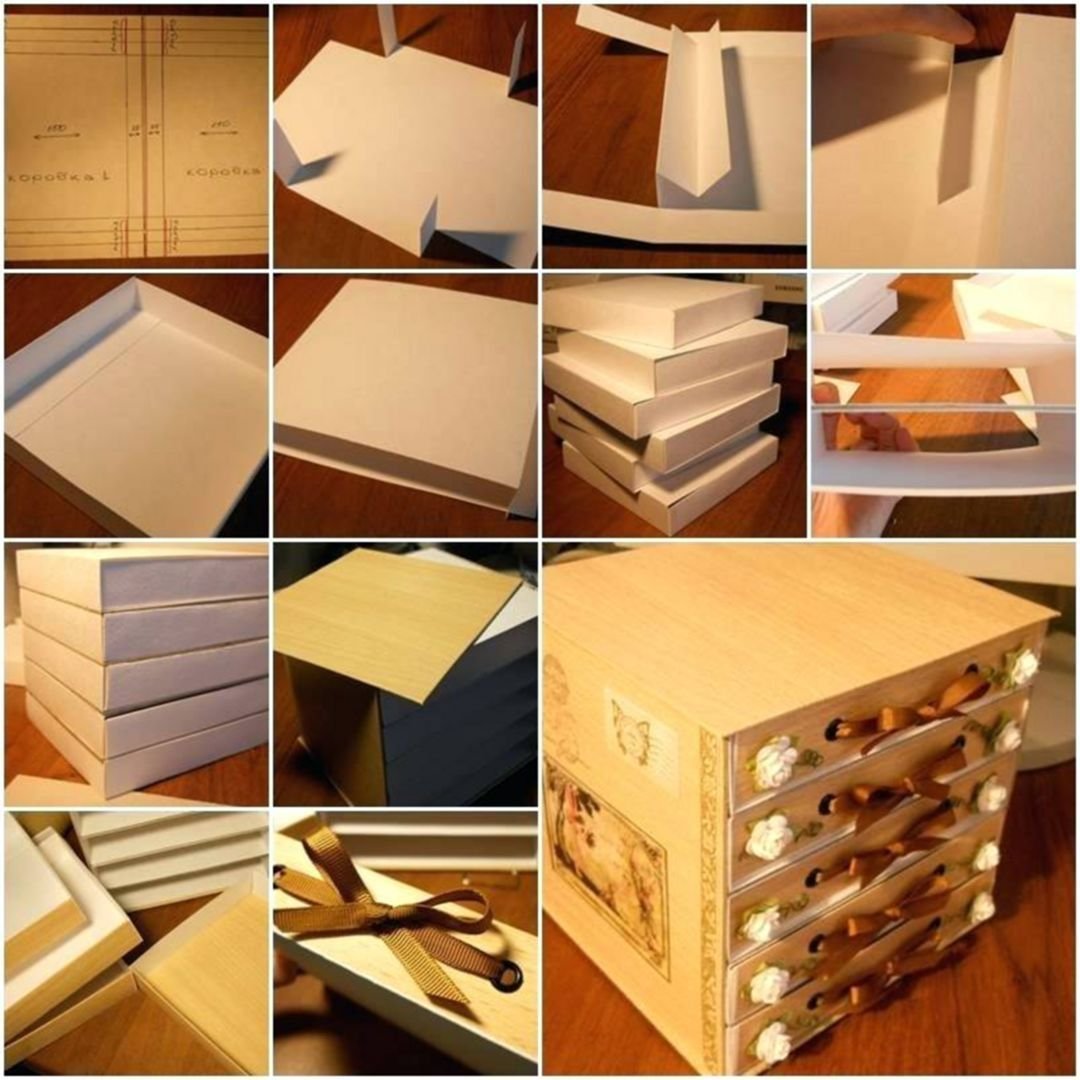
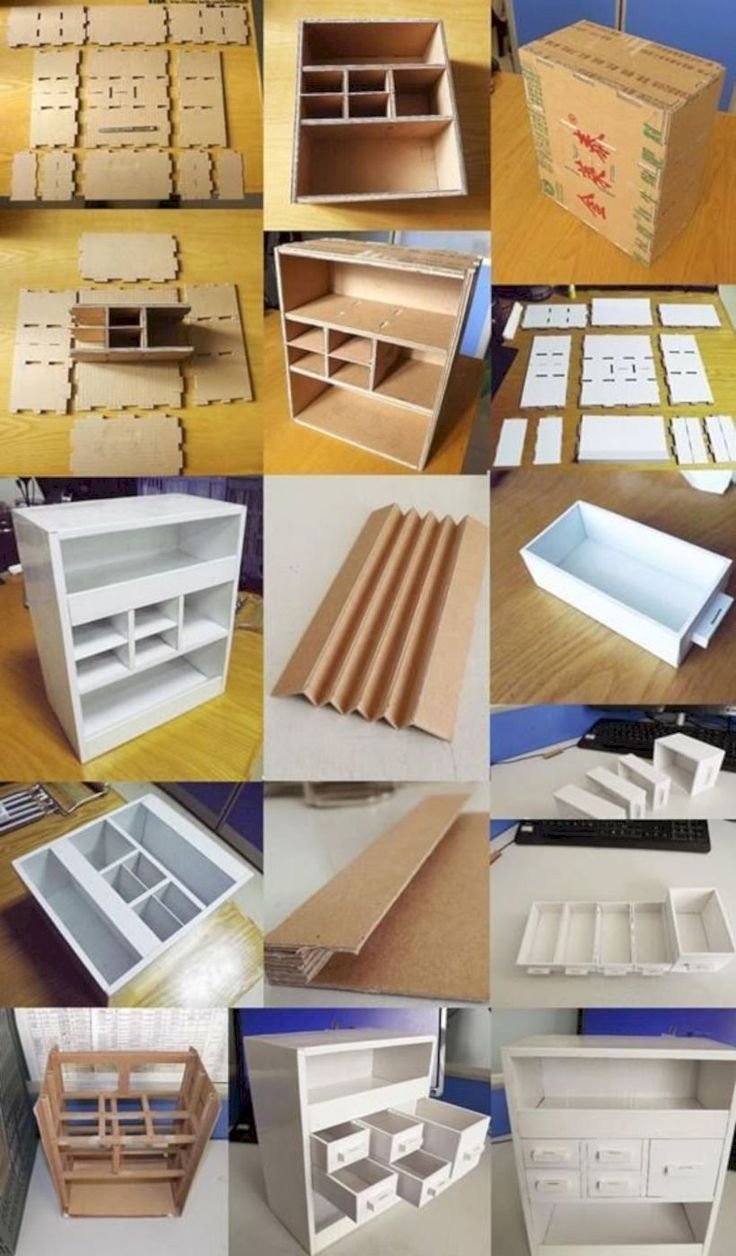
To create your own cardboard organizer, start by gathering sturdy cardboard boxes or sheets. You can easily find these in your recycling bin or at local stores. Next, sketch out your desired design and measurements on the cardboard. Don't be afraid to get creative with different shapes and sizes!
Once you have your design ready, use a cutter or scissors to carefully cut out the pieces. Take your time to ensure clean edges and precise cuts. Then, assemble the pieces together using strong adhesive or tape. If you want to add extra durability, reinforce the corners with hot glue or additional layers of cardboard.
Now comes the fun part – decorating your organizer! Let your imagination run wild as you paint, wrap, or cover it with fabric or wallpaper. You can even personalize it with stickers, stencils, or washi tape to match your room's aesthetic.
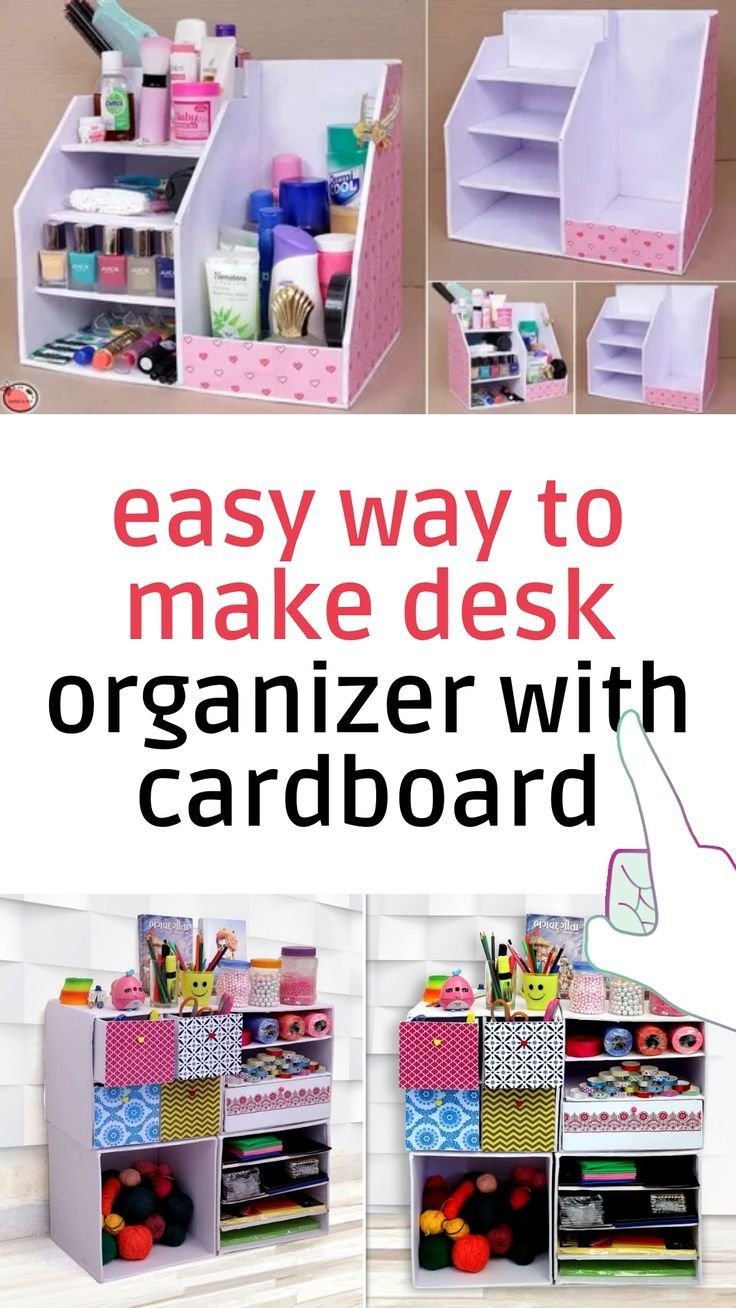
Once your cardboard organizer is complete, it's time to put it to work. Use it to store office supplies, craft materials, toys, or any other items that need a designated home. The compartments you create can help you stay organized and provide easy access to your belongings.
Not only is this DIY project budget-friendly and eco-conscious, but it also allows you to unleash your inner artist. With a DIY cardboard organizer, you can combine functionality and style while reducing waste. So, grab some cardboard and let your creativity soar!